| |
|
| Free
Finchgourd crafting instructions |
| Before
you begin, a word about safety
|
| |
|
| It
is important to be aware of the hazards related to gourd crafting.
Some of the hazards include Dust, mold, spores, bacteria, sharp
or dangerous power tools, and less obvious hazards such as fumes, and
smoke. Work in
well-ventilated areas and always use protective gear when necessary
including respirators and safety glasses.
Gourds and gourd related dust and fumes can be an asthma trigger
and can also cause serious respiratory problems. Gourd crafting
should not be done in a closed environment.
|
|
|
| Getting
started
|
| |
| Selecting
gourds.
Decide what shape and size of gourd you need for your project.
Select a gourd that is dried out enough that the seeds will
rattle when you shake it.
If a gourd is picked while it is still green and full of moisture
it is difficult to tell if the gourd will wrinkle, split, or cave in
because it was not mature enough to harden. |
|
|
| TIP:
Pick
up several gourds similar in size and compare the weight.
Do not get a gourd that is very light when compared to the other
gourds because the shell will be thin and weak.
|
|
| TIP:
Some
projects require uniform shaped gourds but often a deformed gourd will
produce a more interesting final piece so don’t automatically rule out
lop-sided gourds.
|
|
| Cleaning
the exterior.
To remove the moldy skin on the surface of the gourd, soak your
gourd in water for about 20 minutes and then scrub the moldy skin off
with any type of pot scrubber.
Most scrubbers are strong enough to scrape the skin off but
won’t scratch the wood surface of the gourd. |
|
| TIP:
If you drop your scrubber on the ground be sure to rinse it off because
a grain of sand embedded in a scrubber can scratch up your gourd.
The scratches will show when paint or stain is applied. |
|
| For
most projects it is not necessary to sand the exterior of the gourd once
the skin has been removed.
|
|
| Cutting
the gourd.
For many projects you will want to cut the gourd open.
If you cut the gourd open you will need to clean the interior or
your gourd will dribble seeds and debris.
Gourds can be cut open
with a variety of tools, including hand tools and power tools.
My favorite method is using a gourd jig saw. Punch
a hole in the gourd with a thin sharp knife and insert the jigsaw blade.
|
|
| TIP: Hold the jigsaw FIRMLY against the gourd
to prevent jittery vibrations |
|
| ALWAYS
wear a respirator when cutting a gourd. If you can “taste gourd” in
the air it means you are at risk and getting nasty stuff inside your
lungs that can cause serious respiratory problems. |
|
| Cleaning
the interior. Fill the gourd with warm water and let it sit for 2 or
3 hours.
Then scrape the insides out.
You can buy scraping tools or just use a spoon. You can clean a
gourd dry, but that creates a lot of potentially harmful gourd dust. |
|
| TIP:
You can make your own gourd scraper by screwing a large washer on to the
end of a long wood stick. |
|
| If
you are going to use the top of the gourd for a lid be careful not to
sand the top edge so much that the lid does not fit or falls into the
gourd. A rat-tail file or
rolled up sandpaper works well for sanding the rim of the gourd if you
are not going to have a lid. Start
with coarse sandpaper and then use fine sandpaper.
|
|
| TIP:
My favorite sandpaper is the spongy backed type which works great for
sanding curved surfaces. |
|
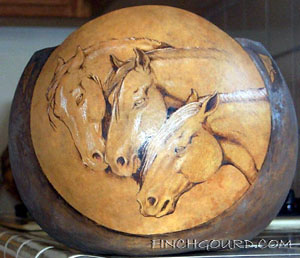
| Embellishments.
Your gourd is ready for painting, staining, dying, carving,
woodburning, or just decorating.
Natural items like feathers, shells, seed pods, and wood, stone
or glass beads look great on gourds.
|
|
| TIP:
To keep your gourd from sliding
around while you work,
place it on a piece of spongy waffle material used to keep rugs
from slipping.
|
|
| By
punching holes around the rim of a cut gourd you can easily coil pine
needles or other decorative material around the top. |
|
| TIP:
Many gourds are soft enough that you can punch the holes with an awl.
If a gourd is hard you can start the hole with an awl and use a
drill to finish the job.
|
|
| Wood-burning
looks great on a gourd but be aware that light shading with a
wood-burner will oxidize and may completely disappear within a few
years.
|
 |
| Acrylic
paints work well on gourds. Be
careful using leather dyes because they contain heavy metal which is
toxic. NEVER wood-burn over
leather dye! I find that
leather dyes fade very quickly.
|
| TIP: If
you want the gourd to show through, water down the acrylic paint |
|
| TIP:
Cut inexpensive kitchen sponges into little cubes to use for sponge
painting. |
|
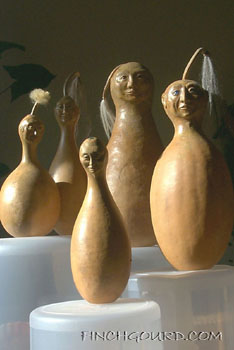
| TIP:
You can stand a gourd on end and make it appear to defy gravity by
stuffing it with lightweight material like expanding polyfoam, or
Styrofoam peanuts and then putting heavy weight in the end to balance
it. |
|
|
Try
these fun garden experiments! |
|
|
|
|
|
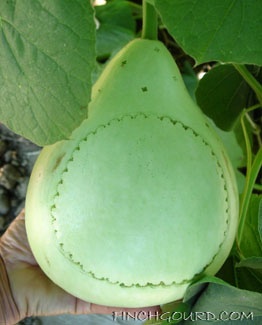
| Use
a leather tool was used to punch a design
in a growing gourd to create a natural frame for your
future gourd art. |
|
|
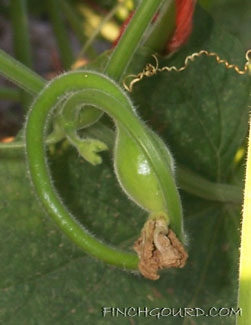
| This
close-up shows the secret to tying
a gourd in a knot.
Gravity will complete the job as the gourd grows. |
|
|
|
|
|
|
|
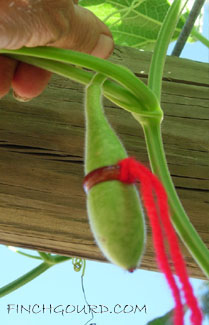
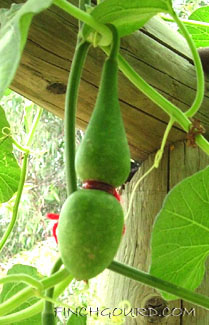
Binding
a gourd - A stone ring placed on a baby gourd (left) and the
result (right) |
|
|
|
|
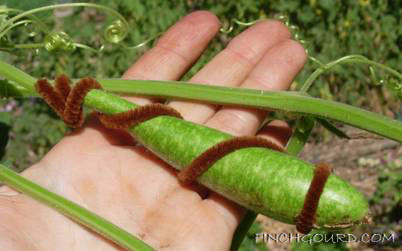
Wrap
a young gourd with a pipe cleaner to create a uniquely
shaped gourd. |
|
|
|
|
|